I used to be the Visiting Teaching Coordinator and found an easy way to keep track of all our visits using Google Drive. This allows all your supervisors to log into your file on Google Drive and record their report each month. It’s a simple way to keep tabs on all the visits, and your Relief Society President can go online as well and see who may need assistance. I think you will love this — no more phone calls to all your supervisors, just send them an email each month as a reminder to log in and record the visits.
Since I have been asked how I set this up I have decided to write a post showing the steps.
Step 1:
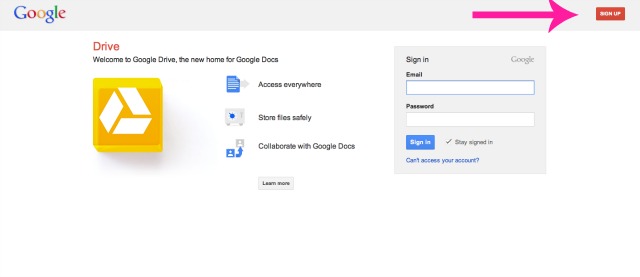
Go to Google Drive and if you do not have a Google account or gmail, then set one up for yourself.
Step 2:
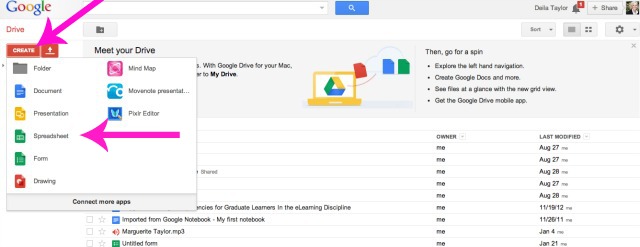
Setup your Visiting Teaching File by clicking on the “Create” button and then select “Spreadsheet”
Step 3:
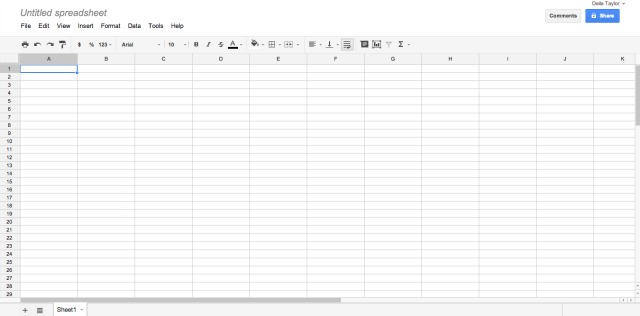
Open the blank spreadsheet and take a look at it. This will be the form you use for each district. If you have 6 districts, you will have one page for each district. The tabs at the bottom of the spreadsheet named here as “sheet 1″open to each new page that you create, and you can name each page district #1, district #2, and so on. You will add pages by clicking on the “+” button at the bottom of the page, just left of the sheet 1 tab.
Step 4:
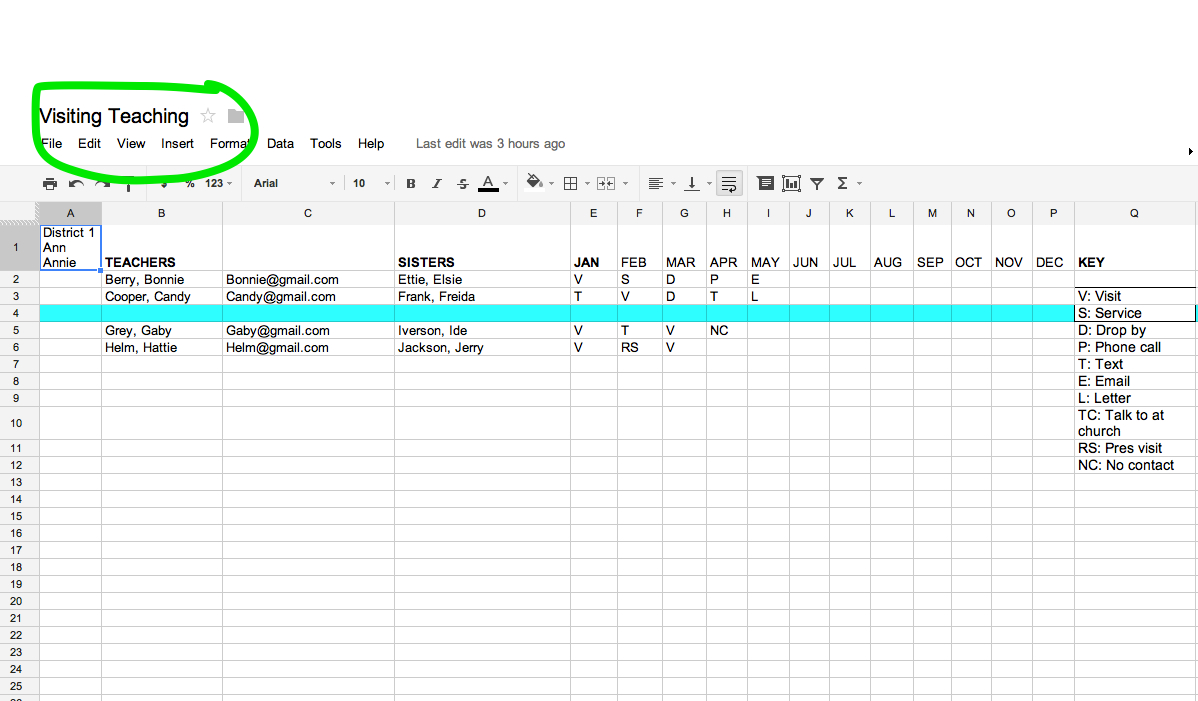
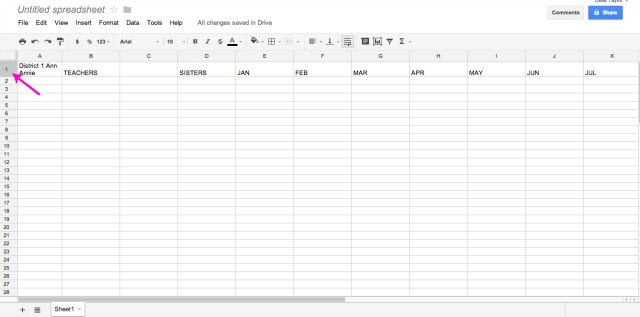
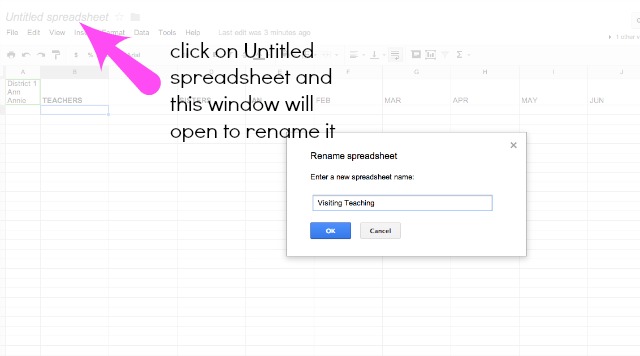
Setup your file by adding the following titles in row one. I bold these titles. In column A add “District 1 and the name of that supervisor”. Column B is “TEACHERS”, column D is “SISTERS” (meaning the sisters that the visiting teachers visit), columns E on are for the months of the year. Also add a name to your spreadsheet — “Visiting Teaching”
Next, name the file:
Step 5:
Start to add names for district 1:
Step 6:
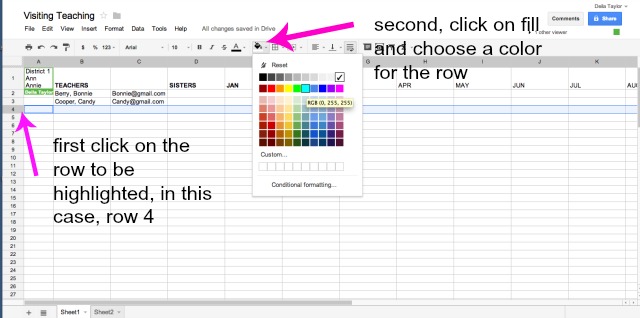
Put in a dividing row between visiting teaching companionships. First click on the row to be highlighted, then choose the paint bucket and color.
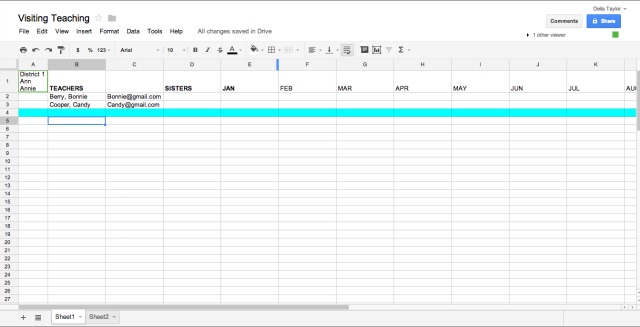
This is how it will now look:
Step 7:
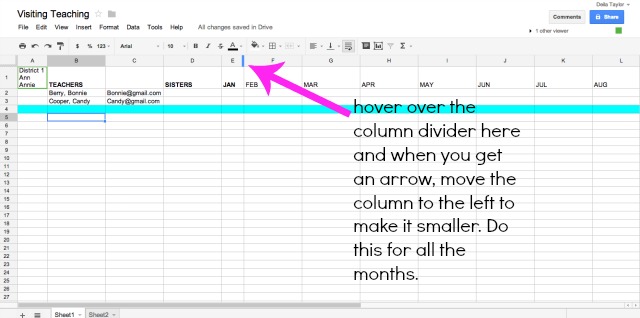
Make the columns smaller for the dates (months), by hovering over the dividing line between the dates and when you get an arrow, move the line to make it smaller.
Step 8:
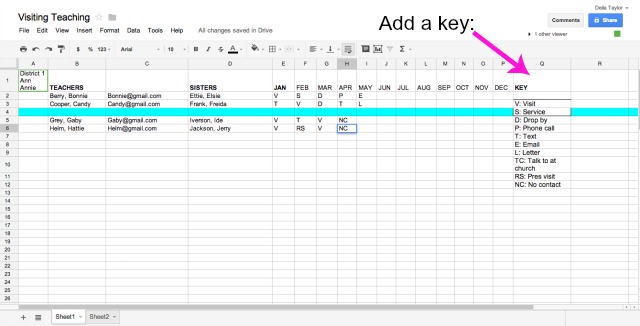
Add more names, and add a key for reporting the visits:
Step 9:
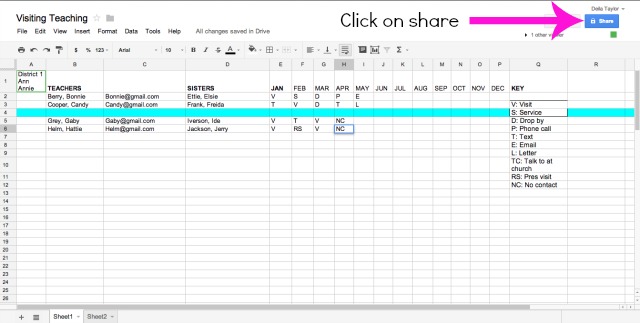
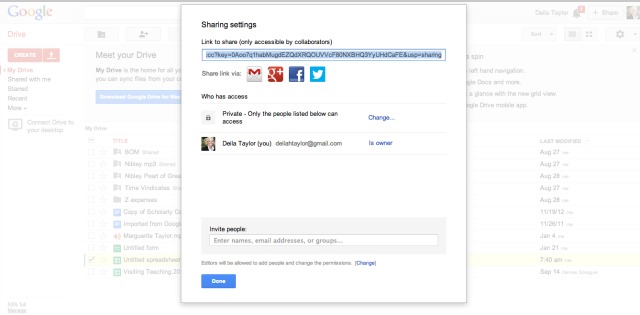
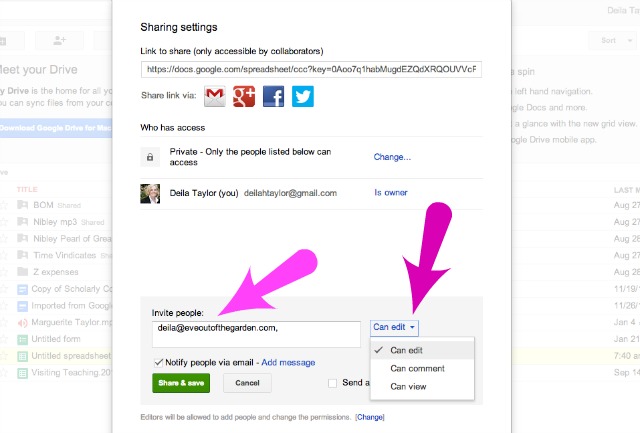
After you have all the districts done, you will want to share your files with your president and your supervisors.
I hope that works as well for you! Let me know if you have any questions.

